Small Groups
Greater access to your expert local guide for a more intimate and personalised experience.
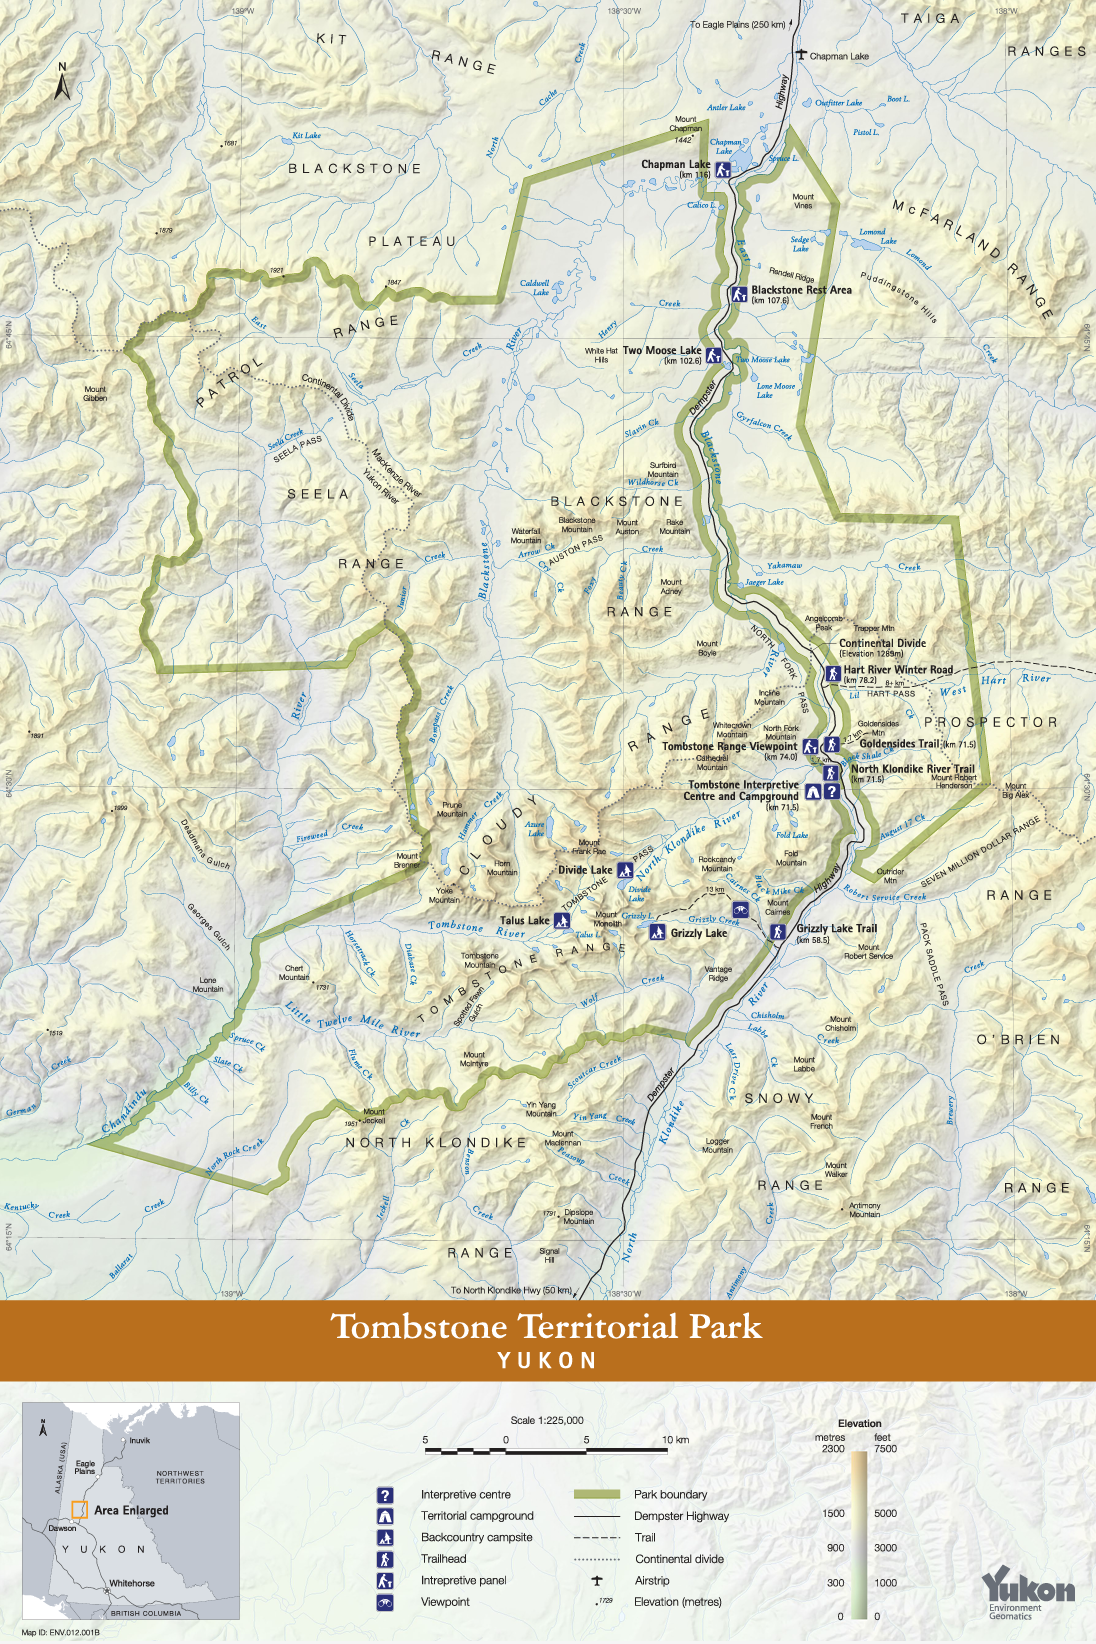
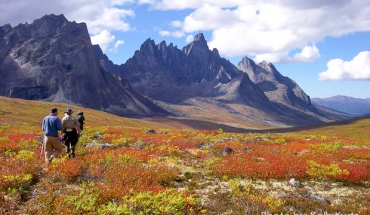
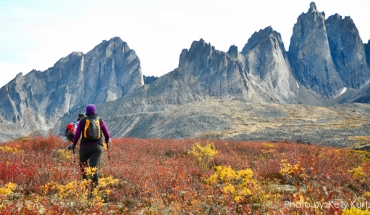
This adventure begins in Dawson City, where we begin by exploring the area and its rich history. We then drive to the Tombstones Interpretive Centre and explore this area of the Tombstone Range before heading north to being our journey along the famed Dempster Highway. With day hikes in spectacular areas along the way, we cross the Arctic Circle into the true North. We finish our tour in Dawson City. There may be an optional heli tour (for an additional cost) of the Tombstone and Ogilvie Ranges on Days 1, 2 or 6.
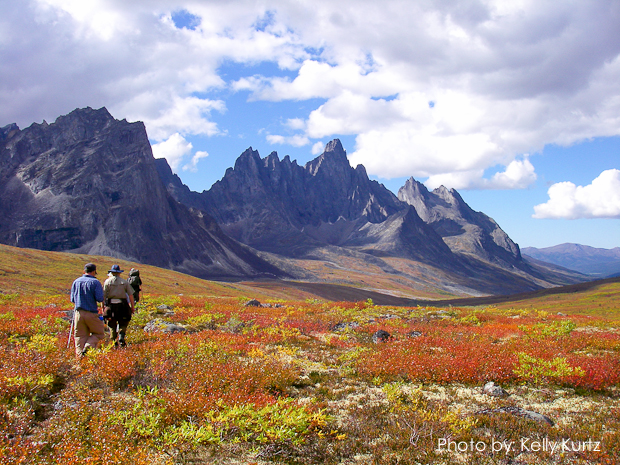
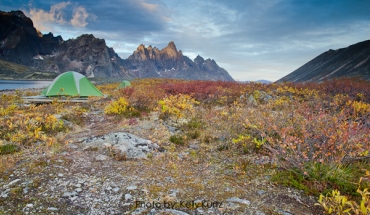
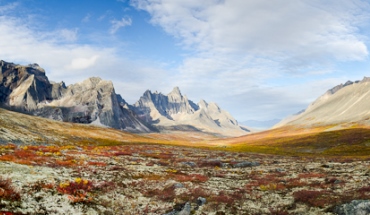
Our adventure into the Tombstone Mountains begins with a helicopter flight into the heart of the region. Our hike out will pass through an imposing landscape of hanging valleys, moraine lakes, and spectacular Tombstone vistas. After hiking our way out of the Tombstone Mountains, along Grizzly Valley, we will rendezvous with our van. We will drive on to Dawson City, restored to its glorious gold rush days. In Dawson City, We will will have several opportinities for tour of the area, with the possibility of visiting the old gold fields, of a drive to the Dome and an exceptional view of Dawson and surrounding regions, or to enjoy an evening of festivity at Diamond Tooth Gertie's.
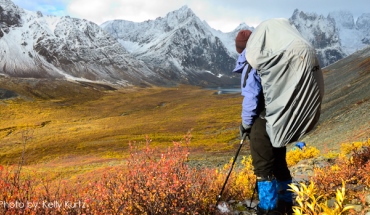
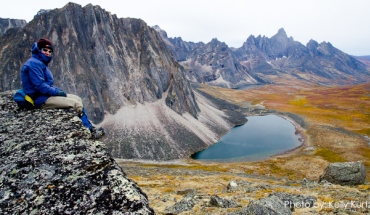
The Fly-in/out Base Camp tour saves a couple of days of very strenuous hiking with full packs. We possible have one or two days of hiking with a full backpack because of campsite availability, but the terrain is uncomplicated. The day hikes will be fairly strenuous because there are no established trails where we go, but we are without the full backpacks. We spend this entire backcountry portion of the trip at the headwaters of two rivers-the Tombstone River and the North Klondike River, essentially one large valley opening up and flowing in two directions, surrounded by the Tombstone Mountain Range.
Greater access to your expert local guide for a more intimate and personalised experience.
Thousands of delighted guests with many returning for more. Experience the Sea to Sky difference and find out why.
Enthusiastic and knowledgeable, our guides offer invaluable source of information on local culture, history and sights making your trip one of a kind.
A complete itinerary along with maps, clothing and equipment list, will be issued upon registration.
Day 0: Arrival in Whitehorse
WHITEHORSE or DAWSON CITY
SEA to SKY will pick up for all expeditions that originate in Whitehorse or Dawson City, depending on the trip. Should any problems or miscommunication arise, please email our office and we will forward you the guide team's contact info. (cell number and email address).
GETTING TO WHITEHORSE/DAWSON CITY
Air Canada has daily flights to Whitehorse. Air North has scheduled flights from Calgary, Edmonton, Victoria and Vancouver. Please check with your travel agent for details. Air North flies to Dawson City.
Whitehorse
Whitehorse Pick up & Hotels
The following represent a cross section of available accommodation in Whitehorse. Former clients have stayed at these and have indicated a satisfaction with them. The asterisk [* ] means a budget and clean accommodation. The Yukon Inn has agreed to discount their rate for our clients. Indicate that you will be doing a trip with us and you should receive a preferred rate.
EdgewaterHotel
1-877-484-3334
www.edgewaterhotelwhitehorse.com
Best Western Gold Rush Inn
1-867-668-9432
www.goldrushinn.com
High Country Inn
1-867-667-4471
www.highcountryinn.ca
Westmark Hotel
1-800-544-0970
www.westmarkhotels.com
Yukon Inn
1-867-667-2527
www.yukoninn.com
Aerie B&B
1-800-863-7779
www.yukon-accommodation.com
Midnight Sun B&B
1-866-284-4448
www.midnightsunbb.com
[*] Beez Kneez Hostel
1-867-456-2333
www.bzkneez.com
[*]Hide on Jeckell Hostel
1-867-633-4933
www.hide-on-jeckell.com
[*] Family Hotel
1-867-668-5558
Dawson City
Dawson City Pick up & Hotels
This is a rugged hike for some portions. The best boots for this kind of backpacking are solid-able to take rough talus slopes, water proof, and with a full, stiff shank for ankle support. If you get new boots, it is important to break them in before your trip to ensure that they are comfortable and to minimize the risk of blisters. It is also a good idea to bring a pair of comfortable sandals or water shoes for wearing around camp and for crossing streams or other bodies of water.
For a six-day backpacking trip in varied terrain, you will want a backpack with a capacity of at least 65-85 liters, depending on the size of your gear and the type of trip you are taking.
Some key features to look for in a backpack for this type of trip include:
Comfort: Look for a backpack with a comfortable and well-padded hip belt and shoulder straps, as well as a good ventilation system to prevent your back from getting too hot and sweaty.
Durability: Choose a backpack made from strong and durable materials, such as ripstop nylon, to withstand the rigors of the trail.
Weather resistance: Consider a backpack with a waterproof or water-resistant cover or built-in rain cover to protect your gear from the elements.
Load-carrying ability: Look for a backpack with a sturdy frame and good load-carrying capacity to support the weight of your gear.
Organization: Choose a backpack with plenty of pockets, compartments, and attachment points to help you keep your gear organized and easily accessible.
Size: Make sure the backpack fits you well and is the right size for your body and your gear.
It is also a good idea to try on a few different backpacks and load them with weight to get a feel for how they carry before making your final decision.
Hiking poles can be a helpful tool for a rugged backpacking trip, as they can provide additional support and stability on rough or uneven terrain. They can also help to reduce the impact on your joints and muscles by distributing some of the load to your upper body.
However, whether or not to use hiking poles is ultimately a personal decision, and it may depend on factors such as your physical abilities, the terrain you will be hiking on, and your personal preference. Some people find that hiking poles help them to maintain balance and reduce fatigue, while others prefer to hike without them.
If you do decide to use hiking poles, it is important to choose a pair that is comfortable, lightweight, and adjustable to your height. It is also a good idea to practice using them before your trip to get a feel for how they work and to ensure that you are using them correctly.
Tips, or gratuities, are not mandatory. However, please consider what service is actually being given to you. While you might think that the company should just pay the guides better, it is not so simple. We do work in a competitive market, and pay rates are a function of the trip prices. If we could double prices, we would pay guides significantly better. At Sea to Sky, we have some of the better pay rates in the industry, and we are always pushing our competitors to increase pay rates for guides, but there is only so much we can do. Guides are seasonal workers. They shift off of their summer season to winter activities, or fill in with retail work, which is usually little more than minimum wage, often to periods of no work between seasonal jobs. It is a hard job, and wearing on the body.
The guides carry most of the group gear, so they have heavier loads than you have, all for you, because they would not be carrying much of the extras on a personal trip. Your guides are teaching you, helping you through challenges, cooking for you and serving you your meals, providing a safety envelope for you, and if you have a really good guide, they are filling you up with a deeper experience of being in the place you are visiting by telling you about the flora, fauna and history of the place.
So, how much should you tip your guides?
If you ate every meal out in a day, at a good, but low-cost restaurant, you would probably tip between $10 and $15 per day. If you were travelling and visiting a city and ate all your meals out, this is about how much you would tip for the day, low end. I would submit that the guides are feeding you all three meals in a day, AND serving you in so many more ways. That makes $10-$15 a day a minimum consideration, really. 10% to 15% of a trip price has been another rule of thumb that has been used. If your trip price is $2000, then $200 to $300 split between the guides is reasonable, and falls within that standard. Like most humans, guides are motivated when they are recognized and valued.
Your circumstances matter. If you are a student and clearly struggled to put together the cost of the trip, or have other circumstances that limit your ability to tip, guides understand and honour your appreciation, no matter what the size. However, if you have a large income or high net worth and means, a small tip might be a slap in the face. If you have means and you clearly and vocally appreciated the guides and all they did, and then leave a $50 tip after a 7 to 9 day trip, that amount would probably be insulting. If you have a fairly large income or net worth, you likely spend it on higher end restaurants, and maybe higher cost wine, drinks or desserts. You might even give a $50 tip for a dinner meal out-for ONE meal, so just consider your ability to tip and the level of service you received over the whole trip.
The largest tip any of our guides has received from one person is $1,500.00 for a 9-day trip. This was highly unusual, and was because we went way out of the way to replace her boots in the middle of the trail because her boots were falling apart, and this was on top of paying for the boots and their transport out to the trail. That was extraordinary service, and an extraordinary tip. On average, guides usually receive about $75 to $125 from each guest for each guide.
At Sea to Sky, we also split the tips between the lead and assistant guides, and proportionally with any drivers. We have a strong culture of teamwork and both the lead and assistant guides play essential roles for you, so we ensure both share equally in the tips for the trip. Tips are not shared or taken by owners and managers not on your trip, unless you send it separately and specify it is for service before or after a trip.
Searching Availability...
For any wilderness adventure, "layering" is one of the most critical concepts.
Layering clothing can have several advantages:
Temperature regulation: Layering allows you to adjust your level of warmth by adding or removing layers as needed. This can be especially useful in unpredictable weather or in environments with fluctuating temperatures.
Comfort: Layering can help you stay comfortable in a range of temperatures and activities. For example, if you're going for a hike, you can wear a base layer to wick sweat away from your skin, a mid layer for insulation, and a outer layer to protect against wind and rain.
Versatility: Layering allows you to mix and match different pieces of clothing to create different looks and adapt to different situations.
Style: Layering can add depth and interest to your outfit, allowing you to express your personal style and create a polished look.
Protection: Layering can also provide protection against the elements, such as wind, rain, and cold temperatures.