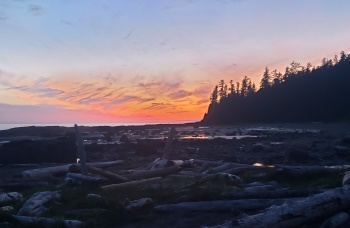
West Coast Trail Dates ("G" indicates guaranteed departure.)
Coastal Bliss Adventures Dates
$2795 until Dec 15, 2025, $2855 after
West Coast Trail Dates for 2026 are now Parks confirmed.
May 31-June 8, 2026 - $2855 + 3% Booking fee + 5% GST Not Available
June 12-20, 2026 - $2855 + 3% Booking fee + 5% GST Not Available
G June 26-July 4, 2026 - $2855 + 3% Booking fee + 5% GST FULL
G July 12-20, 2026 - $2855 + 3% Booking fee + 5% GST FULL
G July 26-August 3, 2026 - $2855 + 3% Booking fee + 5% GST FULL
G August 10-18, 2026 - $2855 + 3% Booking fee + 5% GST Full
G August 24-September 1, 2026 - $2855 + 3% Booking fee + 5% GST 3 spaces available
September 8-16, 2026 - $2855 + 3% Booking fee + 5% GST 5 Spaces Available
Coastal Bliss 2027 Tentative Dates
(Confirmation of finalized dates will be in December 2026. )
June 2-10, 2027 - $2855 + 3% Booking fee + 5% GST 8 spaces available
June 14-22, 2027 - $2855 + 3% Booking fee + 5% GST 8 spaces available
July 2-10, 2027 - $2855 + 3% Booking fee + 5% GST 8 spaces available
July 16-24, 2027 - $2855 + 3% Booking fee + 5% GST 8 spaces available
July 31-August 8, 2027 - $2855 + 3% Booking fee + 5% GST 8 spaces available
August 10-1814-22, 2027 - $2855 + 3% Booking fee + 5% GST 8 spaces available
August 31-September 8, 2027 - $2855 + 3% Booking fee + 5% GST 8 spaces available
September 14-22, 2027 - $2855 + 3% Booking fee + 5% GST 8 Spaces Available
Sea to Sky Expeditions Dates
May 18-26, 2026 - $2855 + 3% Booking fee + 5% GST Not Available
May 30-June 7, 2026 - $2855 + 3% Booking fee + 5% GST Not Available
G June 14-22, 2026 - $2855 + 3% Booking fee + 5% GST 6 Spaces Available
G June 28-July 6, 2026 - $2855 + 3% Booking fee + 5% GST 3 Spaces Available
G July 14-22, 2026 - $2855 + 3% Booking fee + 5% GST 2 Spaces Available
G July 28-August 5, 2026 - $2855 + 3% Booking fee + 5% GST 4 spaces available
G August 12-20, 2026 - $2855 + 3% Booking fee + 5% GST FULL
G August 26-September 3, 2026 - $2855 + 3% Booking fee + 5% GST FULL
Sea to Sky 2027 Tentative Dates
(Confirmation of finalized dates will be in December 2026. )
May 18-26, 2027 - $2855 + 3% Booking fee + 5% GST 8 spaces available
June 4-12, 2027 - $2855 + 3% Booking fee + 5% GST 8 spaces available
June 16-24, 2027 - $2855 + 3% Booking fee + 5% GST 8 Spaces Available
June 30-July 8, 2027 - $2855 + 3% Booking fee + 5% GST 8 Spaces Available
July 14-22, 2027 - $2855 + 3% Booking fee + 5% GST 8 Spaces Available
August 2-10, 2027 - $2855 + 3% Booking fee + 5% GST 8 spaces available
August 16-24, 2027 - $2855 + 3% Booking fee + 5% GST 8 spaces available
September 2-10, 2027 - $2855 + 3% Booking fee + 5% GST 8 spaces available
West Coast Trail Dates ("G" indicates guaranteed departure.)
Sea to Sky Expeditions Dates
May 18-26, 2026 - $2855 + 3% Booking fee + 5% GST Not Available
May 30-June 7, 2026 - $2855 + 3% Booking fee + 5% GST Not Available
G June 14-22, 2026 - $2855 + 3% Booking fee + 5% GST 6 Spaces Available
G June 28-July 6, 2026 - $2855 + 3% Booking fee + 5% GST 3 Spaces Available
G July 14-22, 2026 - $2855 + 3% Booking fee + 5% GST 2 Spaces Available
G July 28-August 5, 2026 - $2855 + 3% Booking fee + 5% GST 4 spaces available
G August 12-20, 2026 - $2855 + 3% Booking fee + 5% GST FULL
G August 26-September 3, 2026 - $2855 + 3% Booking fee + 5% GST FULL
Sea to Sky 2027 Tentative Dates
(Confirmation of finalized dates will be in December 2026. )
May 18-26, 2027 - $2855 + 3% Booking fee + 5% GST 8 spaces available
June 4-12, 2027 - $2855 + 3% Booking fee + 5% GST 8 spaces available
June 16-24, 2027 - $2855 + 3% Booking fee + 5% GST 8 Spaces Available
June 30-July 8, 2027 - $2855 + 3% Booking fee + 5% GST 8 Spaces Available
July 14-22, 2027 - $2855 + 3% Booking fee + 5% GST 8 Spaces Available
August 2-10, 2027 - $2855 + 3% Booking fee + 5% GST 8 spaces available
August 16-24, 2027 - $2855 + 3% Booking fee + 5% GST 8 spaces available
September 2-10, 2027 - $2855 + 3% Booking fee + 5% GST 8 spaces available
Coastal Bliss Adventures Dates
$2795 until Dec 15, 2025, $2855 after
West Coast Trail Dates for 2026 are now Parks confirmed.
May 31-June 8, 2026 - $2855 + 3% Booking fee + 5% GST Not Available
June 12-20, 2026 - $2855 + 3% Booking fee + 5% GST Not Available
G June 26-July 4, 2026 - $2855 + 3% Booking fee + 5% GST FULL
G July 12-20, 2026 - $2855 + 3% Booking fee + 5% GST FULL
G July 26-August 3, 2026 - $2855 + 3% Booking fee + 5% GST FULL
G August 10-18, 2026 - $2855 + 3% Booking fee + 5% GST Full
G August 24-September 1, 2026 - $2855 + 3% Booking fee + 5% GST 3 spaces available
September 8-16, 2026 - $2855 + 3% Booking fee + 5% GST 5 Spaces Available
Coastal Bliss 2027 Tentative Dates
(Confirmation of finalized dates will be in December 2026. )
June 2-10, 2027 - $2855 + 3% Booking fee + 5% GST 8 spaces available
June 14-22, 2027 - $2855 + 3% Booking fee + 5% GST 8 spaces available
July 2-10, 2027 - $2855 + 3% Booking fee + 5% GST 8 spaces available
July 16-24, 2027 - $2855 + 3% Booking fee + 5% GST 8 spaces available
July 31-August 8, 2027 - $2855 + 3% Booking fee + 5% GST 8 spaces available
August 10-1814-22, 2027 - $2855 + 3% Booking fee + 5% GST 8 spaces available
August 31-September 8, 2027 - $2855 + 3% Booking fee + 5% GST 8 spaces available
September 14-22, 2027 - $2855 + 3% Booking fee + 5% GST 8 Spaces Available
Half West Coast Trail 2026 Dates ("G" indicates guaranteed departure.)
Dates have been confirmed with Parks.
G June 8-12, 2026 - $1999 + 3% booking fee + 5% tax 2 spaces available
July 7-11, 2026 - $1999 + 3% booking fee + 5% tax Inquire
Half West Coast Trail 2027 Dates
June 17-21, 2027 - $1999 + 3% booking fee + 5% tax 8 spaces available
July 4-8, 2027 - $1999 + 3% booking fee + 5% tax 8 spaces available
July 18-22, 2027 - $1999 + 3% booking fee + 5% tax 8 spaces available
August 4-8, 2027 - $1999 + 3% booking fee + 5% tax 8 spaces available
August 18-22, 2027 - $1999 + 3% booking fee + 5% tax 8 spaces available
Mini-West Coast Trail 2027 Dates ("G" indicates guaranteed departure.)
*PHONE OR EMAIL TO INQUIRE (Must be booked by phone because of additional reservation requirements, subject to date availability)
Dates to be determined - $1724 + 3% booking fee + 5% tax Inquire
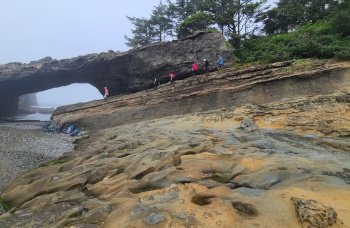
Juan de Fuca Trail Dates ("G" indicates guaranteed departure.)
BC Parks has reopened the Juan de Fuca Trail.
Juan de Fuca Trail 2027 Dates
June 1-6, 2027 - $2125 + 3% booking fee + 5% tax 8 spaces available
June 15-20, 2027 - $2125 + 3% booking fee + 5% tax 8 spaces available
July 6-11, 2027 - $2125 + 3% booking fee + 5% tax 8 spaces available
September 2-7, 2027 - $2125 + 3% booking fee + 5% tax 8 spaces available
Juan de Fuca Trail Base Camp By Request
BC Parks has reopened the Juan de Fuca Trail.
Juan de Fuca Base Camp 2027 Dates
5-day Base Camp Dates to be Determined - $1,780 + 3% booking fee + 5% tax Inquire
Mini-Juan de Fuca Trail Explorer 2027 By Request
BC Parks has reopened the Juan de Fuca Trail.
North Coast Trail Dates ("G" indicates guaranteed departure.)
We typically run scheduled North Coast Trail tours every other year (the next year will be 2027). We may run custom tours for four or more in 2026. Phone to inquire.
North Coast Trail 2027 Dates
July 1-9, 2027 - $3,060 + 3% booking fee + 5% tax 8 spaces available
July 28-August 5, 2027 - $3,060 + 3% booking fee + 5% tax 8 spaces available
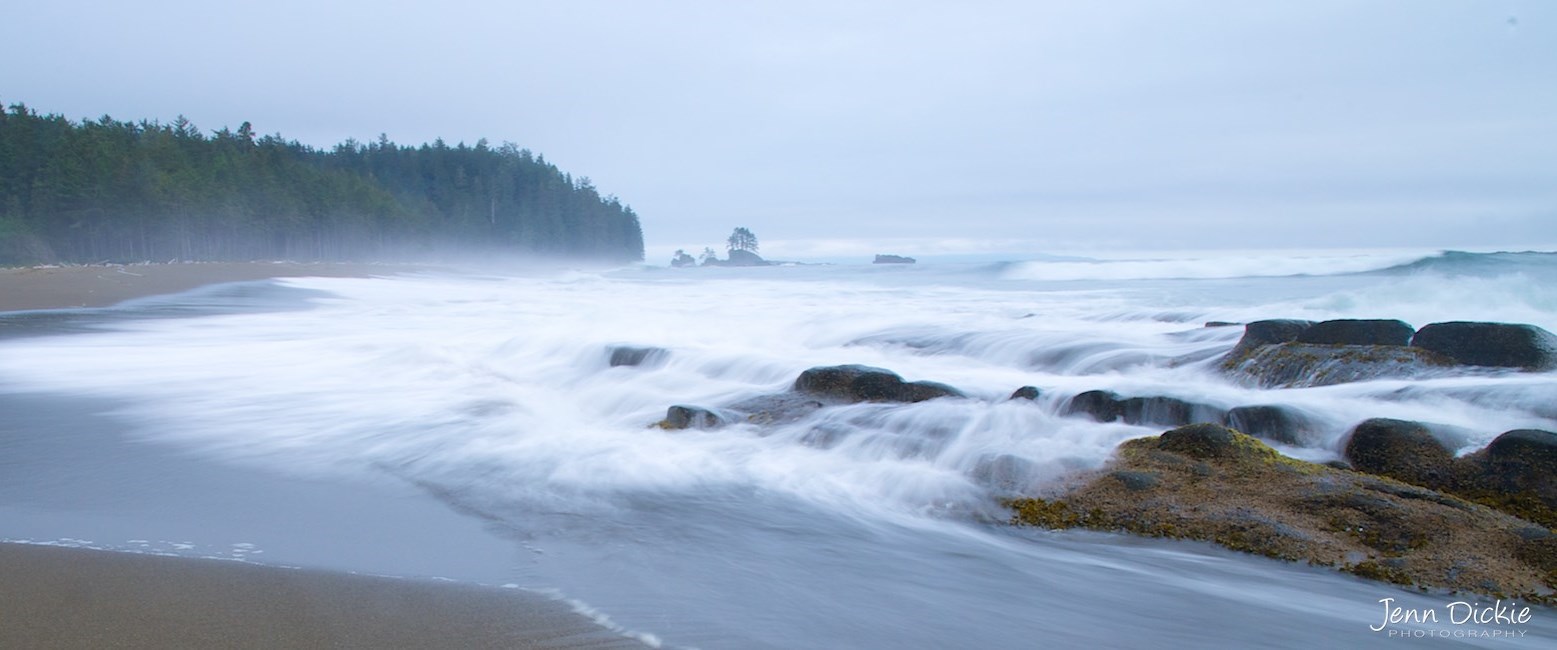
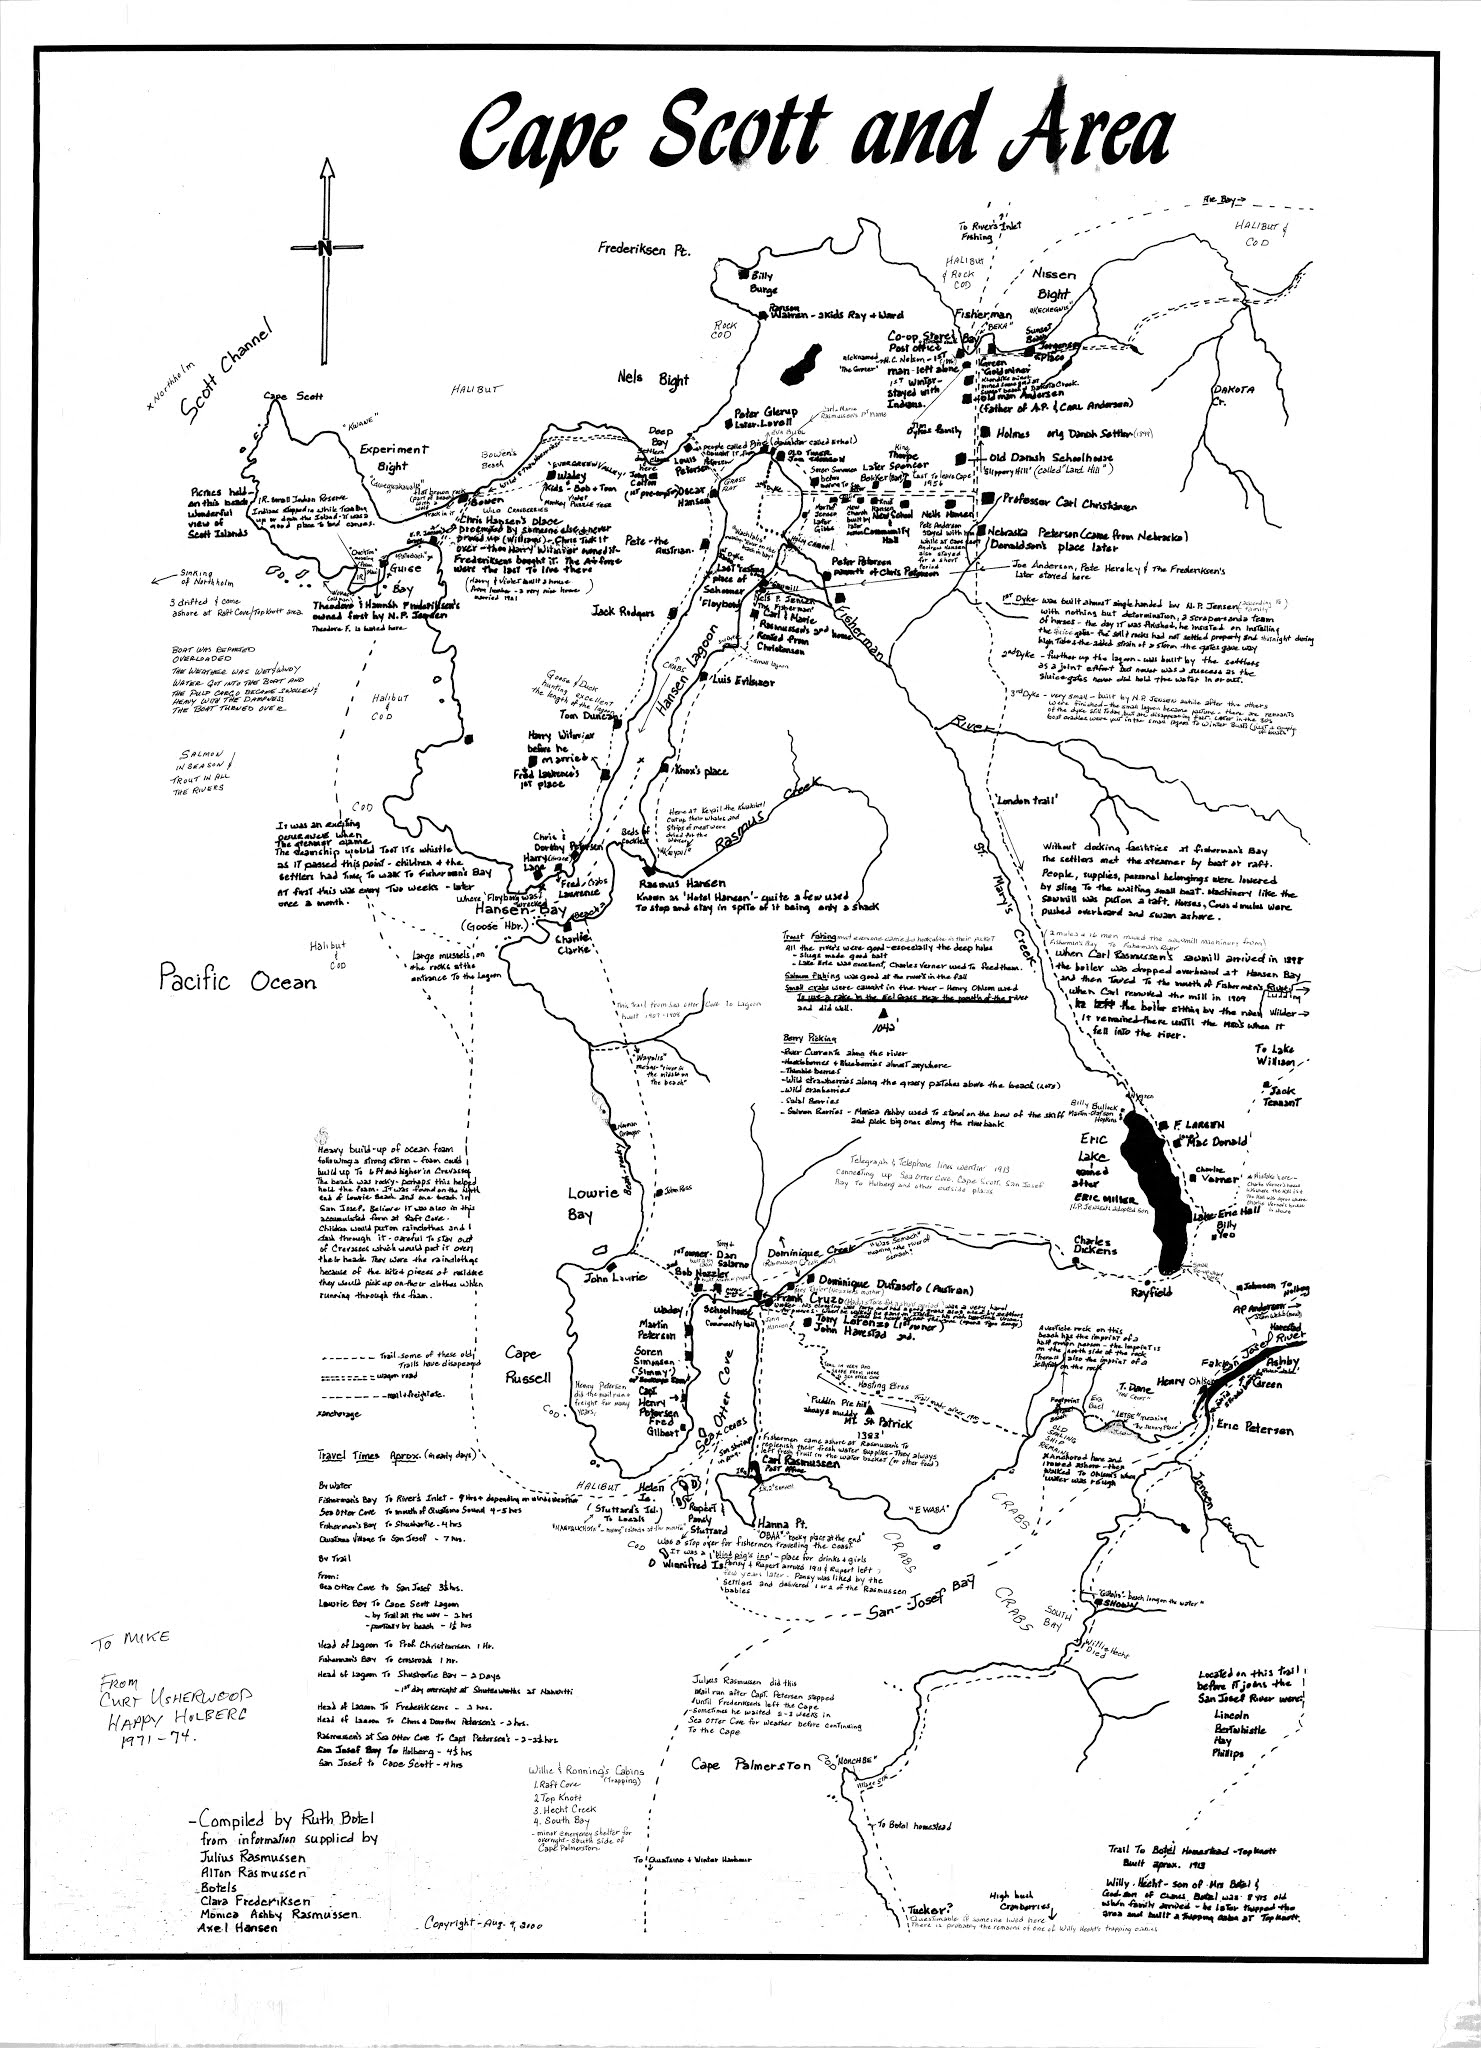
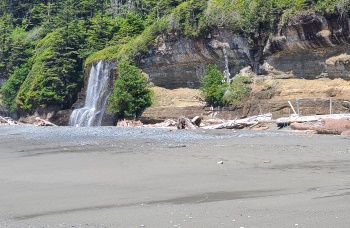
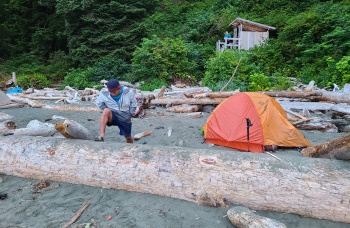
Cape Scott Explorer Dates ("G" indicates guaranteed departure.)
July 4-9, 2026 - $2,245 + 3% booking fee + 5% tax Inquire
July 21-26, 2026 - $2,245 + 3% booking fee + 5% tax Inquire
August 19-24, 2026 - $2,245 + 3% booking fee + 5% tax Inquire
Cape Scott Explorer 2027 Dates
July 1-6, 2027 - $2,245 + 3% booking fee + 5% tax 8 spaces available
July 28-August 2, 2027 - $2,245 + 3% booking fee + 5% tax 8 spaces available
August 21-26, 2027 - $2,245 + 3% booking fee + 5% tax 8 spaces available
Nootka Island Trail Dates ("G" indicates guaranteed departure.)
June 18-23, 2026 - $3,180 + 3% booking fee + 5% tax Inquire
July 15-20, 2026 - $3,180 + 3% booking fee + 5% tax Inquire
August 19-24, 2026 - $3,180 + 3% booking fee + 5% tax 7 spaces available
Nootka Island Trail 2027 Dates
June 18-23, 2027 - $3,180 + 3% booking fee + 5% tax 7 spaces available
July 15-20, 2027 - $3,180 + 3% booking fee + 5% tax 7 spaces available
August 19-24, 2027 - $3,180 + 3% booking fee + 5% tax 7 spaces available
South Chilcotins Dates
The South Chilcotin Mountain tour has been significantly changed over the last several years due to 3rd-party service changes and the Downton Lake fire of 2023. It is still a fantastic trip, a little more difficult than previously, more high country, but well worth the spectacular views and alpine environment. We offer two options: a fly-in/hike-out option and a hike-in/out option.
Fly-in: July 31-August 6, 2026 - $3697 + 3% booking fee + 5% tax 6 spaces available
South Chilcotins 2027 Dates
Fly-in: July 9-15, 2027 - $3697 + 3% booking fee + 5% tax 6 spaces available
Fly-in: August 10-16, 2027 - $3697 + 3% booking fee + 5% tax 6 spaces available
Tombstone Mountains Hike Dates ("G" indicates guaranteed departure.)
These are confirmed dates.
July 27-August 3, 2026 Fly-in - $3,749 + 3% booking fee + 5% 2 spaces available
August 11-18, 2026 Fly-in - $3,749 + 3% booking fee + 5% Inquire
August 23-30, 2026 Fly-in - $3,749 + 3% booking fee + 5% FULL
Tombstone Mountains Expedition 2027 Dates
July 26-August 2, 2027 Fly-in - $3,749 + 3% booking fee + 5% 8 spaces available
August 9-16, 2027 Fly-in - $3,749 + 3% booking fee + 5% 8 spaces available
August 23-30, 2027 Fly-in - $3,749 + 3% booking fee + 5% 8 spaces available
Tombstones Frontcountry Base Camp Hiking Trip 2026 Dates
September 2-9, 2026 - $2995 + 3% booking fee + 5% tax Inquire
Tombstone Mountains Frontcountry Base Camp Hiking 2027 Dates
September 2-9, 2027 - $2995 + 3% booking fee + 5% tax 8 spaces available
7-day Kluane Hiking/Backpacking Base Camp Dates ("G" indicates guaranteed departure.)
June 28-July 4, 2026 - $3,395 + 3% booking fee + 5% tax Inquire
July 9-15, 2026 - $3,395 + 3% booking fee + 5% tax Inquire
7-day Kluane Hiking/Backpacking Base Camp 2027 Dates
June 22-28, 2027 - $3,395 + 3% booking fee + 5% tax 8 spaces available
July 3-9, 2027 - $3,395 + 3% booking fee + 5% tax 8 spaces available
September 2-8, 2027 - $3,395 + 3% booking fee + 5% tax 8 spaces available
4-day Kluane Hiking Base Camp Dates ("G" indicates guaranteed departure.)
July 19-22, 2026 - $2,495 + 3% booking fee + 5% tax Inquire
4-day Kluane Hiking Base Camp 2027 Dates
August 11-14, 2027 - $2,495 + 3% booking fee + 5% tax 8 spaces available
Rainbow Range Dates
This Trip Is Currently In The Permitting Process
Hesquiat Pensisula Trail Dates ("G" indicates guaranteed departure.)
July 31-August 5, 2026 - $3130 + 3% booking fee + 5% tax Not available (Inquire about availability)
We will be running this tour in 2026, scheduled every other year. Plan your trip on this remote coastal hike for 2026 or 2028.
Hesquiat Peninsula Trail 2027 Dates
August 19-24, 2027 - $3130 + 3% booking fee + 5% tax 8 spaces available
Due to political realities, this is now a Canada-only trip as the border crossing is closed. It is now a train-in/floatplane out trip. Check the itinerary for details.
Chilkoot Trail 2026 Dates - The following are dates for a CANADA ONLY Chilkoot trip.
G July 8-14, 2026 - $3,699 +3% booking fee + 5% tax 6 Spaces Available
August 13-19, 2026 - $3,699 +3% booking fee + 5% tax Inquire
Chilkoot Trail Canada 2027 Dates
July 18-24, 2027 - $3,699 +3% booking fee + 5% tax 8 spaces available
August 13-19, 2027 - $3,699 +3% booking fee + 5% tax 8 spaces available
Pembrokeshire Coast & Inland Trail 2025 By Request
Broken Group Islands Dates ("G" indicates guaranteed departure.)
(6 days) July 2-7, 2026 - $2,275 + 3% booking fee + 5% tax *2 spaces available (for intermediate or higher level kayakers, expedition style)
G (6 days) July 2-7, 2026 - $2,275 + 3% booking fee + 5% tax *2 spaces available (for intermediate or higher level kayakers, expedition style)
(6 days) July 26-31, 2026 - $2,275 + 3% booking fee + 5% tax Inquire
(4 days) July 26-29, 2026 - $1,754 + 3% booking fee + 5% tax Inquire
(6 days) August 9-14, 2026 - $2,275 + 3% booking fee + 5% tax *Not available
(4 days) August 9-12, 2026 - $1,754 + 3% booking fee + 5% tax 6 spaces available
(6 days) August 28-September 2, 2026 - $2,275 + 3% booking fee + 5% tax *Inquire
(4 days) August 28-31, 2026 - $1,754 + 3% booking fee + 5% tax Inquire
*The number of spaces may depend on paddlers' experience and kayak type. We have strict guide-to-client ratios that dictate the available spaces.
Broken Group Islands 2027 Dates
6-days
July 2-7, 2027 - $2,275 + 3% booking fee + 5% tax 8 spaces available
July 26-31, 2027 - $2,275 + 3% booking fee + 5% tax 8 spaces available
August 9-14, 2027 - $2,275 + 3% booking fee + 5% tax 8 spaces available
August 29- September 3, 2027 - $2,275 + 3% booking fee + 5% tax 8 spaces available
4-days
July 2-5, 2027 - $1,754 + 3% booking fee + 5% tax 8 spaces available
July 26-29, 2027 - $1,754 + 3% booking fee + 5% tax 8 spaces available
August 9-12, 2027 - $1,754 + 3% booking fee + 5% tax 8 spaces available
August 20-23, 2027 - $1,754 + 3% booking fee + 5% tax 8 spaces available
August 29- September 1, 2027 - $1,754 + 3% booking fee + 5% tax 8 spaces available
Nootka Sound Dates ("G" indicates guaranteed departure.)
July 2-7, 2026 - $2,355 + 3% booking fee + 5% tax Inquire
July 26-31, 2026 - $2,355 + 3% booking fee + 5% tax Inquire
August 9-14, 2026 - $2,355 + 3% booking fee + 5% tax *6 spaces available
August 28-September 2, 2026 - $2,355 + 3% booking fee + 5% tax Inquire
*The number of spaces may depend on paddlers' experience and kayaks. We have strict guide to client ratios that dictate the available spaces.
Nootka Sound 2027 Dates
July 2-7, 2027 - $2,355 + 3% booking fee + 5% tax *8 spaces available
August 9-14, 2027 - $2,355 + 3% booking fee + 5% tax *8 spaces available
Broughton Archipelago Dates Available Soon ("G" indicates guaranteed departure.)
*The number of spaces may depend on paddlers' experience and kayaks. We have strict guide to client ratios that dictate the available spaces.
Johnstone Straight-Kayaking with Whales Dates ("G" indicates guaranteed departure.)
July 20-25, 2026 - $2,794 + 3% booking fee + 5% tax Inquire
August 2-7, 2026 - $2,794 + 3% booking fee + 5% tax Inquire
August 16-21, 2026 - $2,794 + 3% booking fee + 5% tax *6 spaces available
August 26-31, 2026 - $2,794 + 3% booking fee + 5% tax Inquire
*The number of spaces may depend on paddlers' experience and kayaks. We have strict guide to client ratios that dictate the available spaces.
Johnstone Straight 2027 Dates
July 11-16, 2027 - $2,794 + 3% booking fee + 5% tax *8 spaces available
July 23-28, 2027 - $2,794 + 3% booking fee + 5% tax *8 spaces available
August 1-6, 2027 - $2,794 + 3% booking fee + 5% tax *8 spaces available
August 16-21, 2027 - $2,794 + 3% booking fee + 5% tax *8 spaces available
August 27-September 1, 2027 - $2,794 + 3% booking fee + 5% tax *8 spaces available
Blackfish Orca 5-day Base Camp Dates ("G" indicates guaranteed departure.)
July 20-24, 2026 - $2,399 + 3% booking fee + 5% tax *8 spaces available
August 4-8, 2026 - $2,399 + 3% booking fee + 5% tax *8 spaces available
August 14-18, 2026 - $2,399 + 3% booking fee + 5% tax *8 spaces available
August 26-30, 2026 - $2,399 + 3% booking fee + 5% tax *8 spaces available
*The number of spaces may depend on paddlers' experience and kayaks. We have strict guide to client ratios that dictate the available spaces.
Blackfish Orca 5-day Base Camp 2027 Dates
Not available for 2027
Blackfish/Johnstone Kayaking with Whales 4-day Base Camp Dates ("G" indicates guaranteed departure.)
July 20-23, 2026 - $2,199 + 3% booking fee + 5% tax Inquire
August 4-7, 2026 - $2,199 + 3% booking fee + 5% tax Inquire
August 14-17, 2026 - $2,199 + 3% booking fee + 5% tax Inquire
August 26-29, 2026 - $2,199 + 3% booking fee + 5% tax Inquire
*The number of spaces may depend on paddlers' experience and kayaks. We have strict guide to client ratios that dictate the available spaces.
Blackfish/Johnstone Kayaking with Whales 4-day Base Camp 2027 Dates
July 11-14, 2027 - $2,199 + 3% booking fee + 5% tax 8 spaces available
July 23-26, 2027 - $2,199 + 3% booking fee + 5% tax 8 spaces available
August 9-12, 2027 - $2,199 + 3% booking fee + 5% tax 8 spaces available
August 23-26, 2027 - $2,199 + 3% booking fee + 5% tax 8 spaces available
September 3-6, 2027 - $2,199 + 3% booking fee + 5% tax 8 spaces available
Clayoquot Sound/Vargas Island Dates ("G" indicates guaranteed departure.)
July 2-7, 2026 - $2,325 + 3% booking fee + 5% tax Inquire
July 26-31, 2026 - $2,325 + 3% booking fee + 5% tax Inquire
August 9-14, 2026 - $2,325 + 3% booking fee + 5% tax Inquire
August 28-September 2, 2026 - $2,325 + 3% booking fee + 5% tax Inquire
*The number of spaces may depend on paddlers' experience and kayaks. We have strict guide to client ratios that dictate the available spaces.
Clayoquot Sound 2027 Dates
No available dates
Gulf Islands Adventures Dates ("G" indicates guaranteed departure.)
3-Day Adventures
3-days June 13-15, 2026 - $1393 + 3% booking fee + 5% tax Inquire
3-days July 26-28, 2026 - $1393 + 3% booking fee + 5% tax *6 spaces available
4-Day Adventures
4-days June 27-30, 2026 - $1659 + 3% booking fee + 5% tax Inquire
4-days August 9-12, 2026 - $1659 + 3% booking fee + 5% tax Inquire
*The number of spaces may depend on paddlers' experience and kayaks. We have strict guide to client ratios that dictate the available spaces.
Gulf Islands Adventures 2027 Dates
3-Day Adventures
3-days June 13-15, 2027 - $1393 + 3% booking fee + 5% tax 8 spaces available
3-days July 26-28, 2027 - $1393 + 3% booking fee + 5% tax 8 spaces available
4-Day Adventures
4-days June 27-30, 2027 - $1659 + 3% booking fee + 5% tax 8 spaces available
4-days August 9-12, 2027 - $1659 + 3% booking fee + 5% tax 8 spaces available
Main Lakes (Quadra Is.) Dates Available Soon
Main Lakes Canoeing 2027 Dates
No dates available
Bowron Lakes Dates*
*Dates will be confirmed with Parks in the Autumn.
June 17-26, 2026 - $2825 + 3% booking fee + 5% tax Not available
G July 5-14, 2026 - $2825 + 3% booking fee + 5% tax 3 spaces available
July 18-27, 2026 - $2825 + 3% booking fee + 5% tax 7 spaces available
August 2-11, 2026 - $2825 + 3% booking fee + 5% tax Not available
August 18-27, 2026 - $2825 + 3% booking fee + 5% tax 8 spaces available
G September 8-17, 2026 - $2825 + 3% booking fee + 5% tax Unavailable (Private Tour)
Bowron Lakes 2027 Dates
June 17-26, 2027 - $2825 + 3% booking fee + 5% tax 8 spaces available
July 5-14, 2027 - $2825 + 3% booking fee + 5% tax 8 spaces available
July 18-27, 2027 - $2825 + 3% booking fee + 5% tax 8 spaces available
August 2-11, 2027 - $2825 + 3% booking fee + 5% tax 8 spaces available
August 18-27, 2027 - $2825 + 3% booking fee + 5% tax 8 spaces available
September 3-12, 2027 - $2825 + 3% booking fee + 5% tax 8 spaces available
Turner Lakes Canoeing Tour 2025 Dates
This Trip Is In The Middle Of The Permitting Process. We are awaiting the final word on the permit. ("G" indicates guaranteed departure.)
Yukon River Canoeing Dates ("G" indicates guaranteed departure.)
June 17-26, 2026 - $3380 + 3% booking fee + 5% tax
$3119 for 2-3 people booking directly by phone
$2769 for 4+ people booking directly by phone at +1-250-715-0034
10 spaces available
July 12-21, 2026 - $3380 + 3% booking fee + 5% tax
$3119 for 2-3 people booking directly by phone
$2769 for 4+ people booking directly by phone at +1-250-715-0034
10 spaces available
July 29-August 7, 2026 - $3380 + 3% booking fee + 5% tax
$3119 for 2-3 people booking directly by phone
$2769 for 4+ people booking directly by phone at +1-250-715-0034
10 spaces available
August 19-28, 2026 - $3380 + 3% booking fee + 5% tax
$3119 for 2-3 people booking directly by phone
$2769 for 4+ people booking directly by phone at +1-250-715-0034
10 spaces available
Yukon River Canoeing 2027 Dates
July 14-23, 2027 private group - $3380 + 3% booking fee + 5% tax
Not available
July 29-August 7, 2027 - $3380 + 3% booking fee + 5% tax
$3119 for 2-3 people booking directly by phone
$2769 for 4+ people booking directly by phone at +1-250-715-0034
10 spaces available
August 18-27, 2027 - $3380 + 3% booking fee + 5% tax
$3119 for 2-3 people booking directly by phone
$2769 for 4+ people booking directly by phone at +1-250-715-0034
10 spaces available
Teslin River Canoeing 2026 Dates
June 17-26, 2026 - $3459 + 3% booking fee + 5% tax
$2879 for 2-3 people booking directly by phone
$2559 for 4+ people booking phone at +1-250-715-0034
Contact us to inquire
July 29-August 7, 2026 - $3459 + 3% booking fee + 5% tax
$2879 for 2-3 people booking directly by phone
$2559 for 4+ people booking phone at +1-250-715-0034
Contact us to inquire
Teslin River Canoeing 2027 Dates
July 14-23, 2027 - $3459 + 3% booking fee + 5% tax
$2879 for 2-3 people booking directly by phone
$2559 for 4+ people booking phone at +1-250-715-0034
8 spaces available
July 29-August 7, 2027 - $3459 + 3% booking fee + 5% tax
$2879 for 2-3 people booking directly by phone
$2559 for 4+ people booking phone at +1-250-715-0034
8 spaces available
August 18-27, 2027 - $3459 + 3% booking fee + 5% tax
$2879 for 2-3 people booking directly by phone
$2559 for 4+ people booking phone at +1-250-715-0034
8 spaces available
Nisutlin River Canoeing 2026 Dates
July 1-7, 2026 - $3380 + 3% booking fee + 5% tax Inquire
August 10-16, 2026 - $3380 + 3% booking fee + 5% tax 8 spaces available
August 19-25, 2026 - $3380 + 3% booking fee + 5% tax Inquire
Nisutlin River Canoeing 2027 Dates
July 2-8, 2027 - $3380 + 3% booking fee + 5% tax 8 spaces available
July 15-21, 2027 - $3380 + 3% booking fee + 5% tax 8 spaces available
July 30-August 5, 2027 - $3380 + 3% booking fee + 5% tax 8 spaces available
For any wilderness adventure, "layering" is one of the most critical concepts.
Layering clothing can have several advantages:
Temperature regulation: Layering allows you to adjust your level of warmth by adding or removing layers as needed. This can be especially useful in unpredictable weather or in environments with fluctuating temperatures.
Comfort: Layering can help you stay comfortable in a range of temperatures and activities. For example, if you're going for a hike, you can wear a base layer to wick sweat away from your skin, a mid layer for insulation, and a outer layer to protect against wind and rain.
Versatility: Layering allows you to mix and match different pieces of clothing to create different looks and adapt to different situations.
Style: Layering can add depth and interest to your outfit, allowing you to express your personal style and create a polished look.
Protection: Layering can also provide protection against the elements, such as wind, rain, and cold temperatures.